How to Replace a Garbage Disposer in Ocala, FL
If your garbage disposer is giving you trouble, you might be wondering if you need to call a professional plumber or if you can do it yourself. Replacing a garbage disposer is not as hard as it sounds, and you can save some money by doing it on your own. In this guide, we’ll show you how to replace a garbage disposer in easy steps, with the help of Ocala Handyman Co., your go-to handyman service in Ocala, FL.
Why Replace a Garbage Disposer?
A garbage disposer is a useful appliance that helps you get rid of food waste and keep your kitchen sink clean and odor-free. However, over time, a garbage disposer can wear out, break down, or get jammed by foreign objects. Some of the common signs that your garbage disposer needs to be replaced are:
- It makes loud or unusual noises when you turn it on.
- It leaks water or waste under the sink.
- It doesn’t grind food properly or at all.
- It trips the circuit breaker or stops working frequently.
- It smells bad even after cleaning it.
If you notice any of these problems, you should consider replacing your garbage disposer as soon as possible. A faulty garbage disposer can cause plumbing issues, damage your pipes, attract pests, and create a health hazard in your home.
What You’ll Need to Replace a Garbage Disposer
Before you start the replacement process, you’ll need to gather some tools and materials. Here’s what you’ll need:
| Tools | Materials |
|---|---|
| Adjustable wrench | New garbage disposer |
| Plumber’s putty | Plumber’s putty |
| Screwdriver (preferably 4-in-1) | Electrical cord (if your disposer doesn’t come with one) |
| Pipe wrench | |
| Bucket | |
| Stack of books or wood shims for support |
You can find most of these tools and materials at your local hardware store, or you can order them online. If you’re not sure what type or size of garbage disposer to buy, you can check out this guide from Consumer Reports¹ for some helpful tips.
Safety First: Turn Off the Power and Water Supply
The first and most important step before replacing a garbage disposer is to turn off the power and water supply to the old unit. This will prevent any accidents or injuries from electric shocks or water spills.
To turn off the power, you can either flip the circuit breaker or unplug the disposer from the outlet under the sink. If your disposer is hardwired, you’ll need to turn off the breaker that controls it.
To turn off the water supply, you’ll need to locate the shut-off valve under the sink and turn it clockwise until it stops. You can also turn off the main water valve for your house if you can’t find the individual valve.
Once you’ve turned off both the power and water supply, you’re ready to start removing the old unit.
Step-by-Step Guide to Replacing a Garbage Disposer
Step 1: Prep Your Work Area
Before you start removing the old unit, you’ll need to prep your work area. Place a stack of books or wood shims under the old disposer to support it. Position a bucket under the sink to catch any residual water or waste. You might also want to wear gloves and goggles to protect your hands and eyes from any debris.
Step 2: Disconnect the Drain Pipe
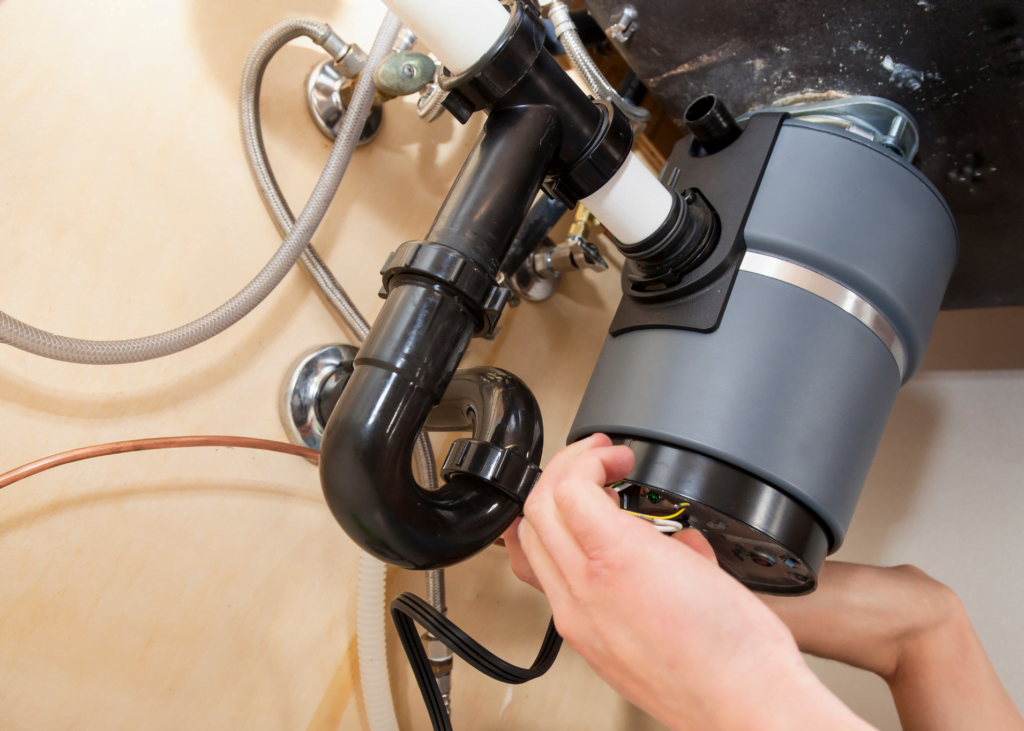
Use an adjustable wrench to disconnect the drain pipe connected to the disposer. This is the pipe that runs from the disposer to the drain trap. Loosen the nut that holds the pipe in place and pull it out. Be careful, as some water or waste might spill out.
Step 3: Remove the Old Unit
Insert a screwdriver into the disposer’s locking ring and rotate it away from you. This will release the unit from the mounting assembly under the sink. Carefully lower the unit onto the books or shims. You might need some help with this step, as some disposers can be quite heavy.
Step 4: Detach the Electrical Cord
If your disposer is hardwired, disconnect the wires by unscrewing the wire nuts and separating them. If it’s plugged in, simply unplug it. If the electrical cord is in good shape, you can reuse it for your new unit. Otherwise, you’ll need to buy a new one.
Step 5: Prep the New Disposer
Apply a ring of plumber’s putty around the drain hole in the sink. This will create a watertight seal for the new unit. Follow the manufacturer’s instructions to attach the mounting ring and gasket to the new disposer. If your disposer doesn’t come with an electrical cord, you’ll need to attach one by following these steps:
- Remove the cover plate from the bottom of the disposer.
- Feed the cord through the access hole and secure it with a strain relief clamp.
- Connect the wires by matching their colors and twisting on wire nuts.
- Replace the cover plate and tighten the screws.
Step 6: Install the New Disposer
Align the new disposer with the mounting assembly under the sink. Use your free hand to turn the locking ring, securing the disposer to the mount. Make sure it’s aligned properly and doesn’t wobble.
Step 7: Reconnect the Drain and Electrical
Reattach the drain pipe and make sure it’s tightened securely. You might need to adjust its length or angle to fit properly. Connect the electrical cord or hardwire the unit as applicable. If you’re plugging it in, make sure it’s in a GFCI outlet for safety.
Step 8: Test the Unit
After everything is installed, turn on both power and water supply back on. Run some water through your sink and turn on your new disposer to check for leaks and proper functioning. If you notice any problems, turn off everything and recheck your connections.
Congratulations! You’ve Successfully Replaced Your Garbage Disposer
You’ve just completed a DIY project that can save you money and hassle in the long run. Replacing a garbage disposer is not as hard as it seems, as long as you have the right tools and materials prepared ahead of time.
If you need any help with this or any other handyman project in Ocala, FL, don’t hesitate to contact Ocala Handyman Co., your trusted and reliable handyman service provider. We have years of experience and expertise in plumbing, electrical, carpentry, painting, flooring, and more. We offer free estimates, fair prices, quality workmanship, and customer satisfaction.
To get in touch with us, simply click on this button below or call us at (352) 320-5265.


